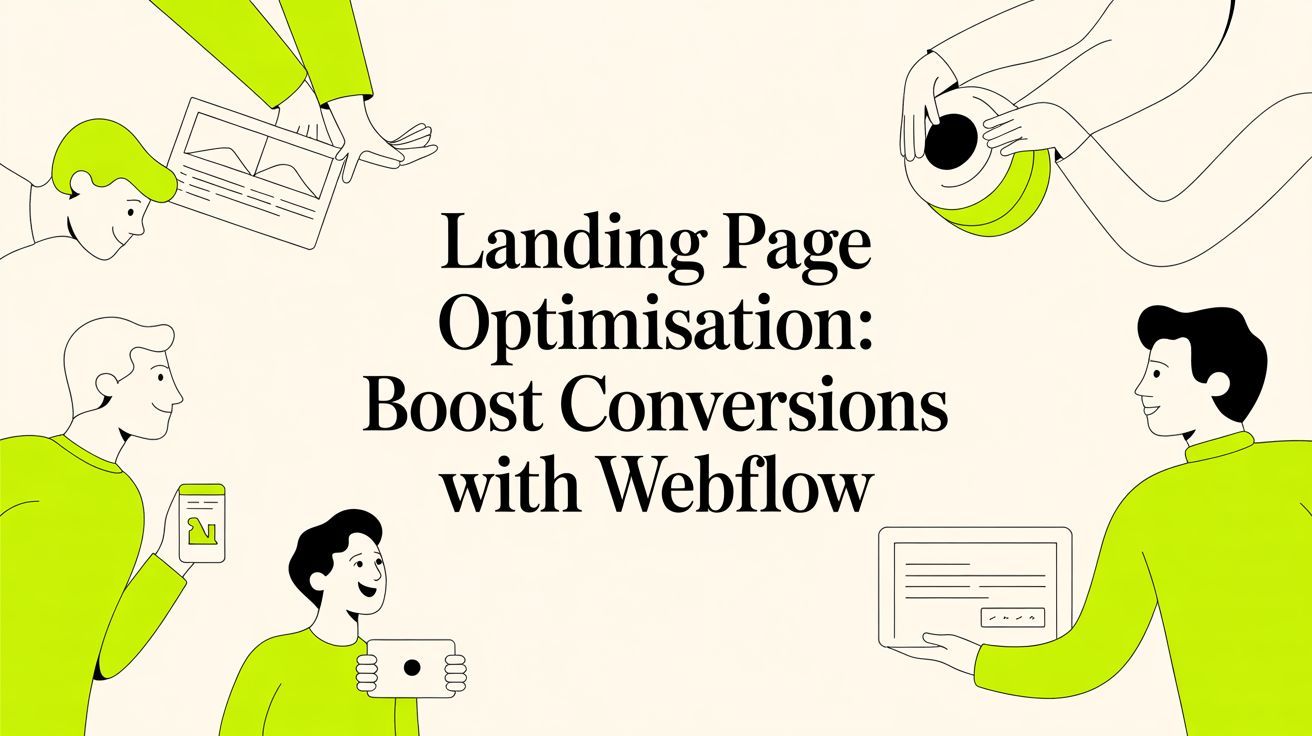
landing page optimisation: Boost Conversions with Webflow
%20(1).avif) Written by Derrick Kityo
Written by Derrick KityoDiscover expert strategies for landing page optimisation on Webflow. Boost conversions with proven CRO, SEO, and A/B testing tactics.
Landing page optimisation is all about systematically improving every single part of your page to boost conversions. Think of it as a data-backed process of tweaking headlines, copy, calls-to-action (CTAs), and the overall user experience to get better results. This isn't about guesswork; it's about making smart, informed changes that turn more visitors into customers.
Auditing Your Webflow Landing Pages
Before you start changing things, you need to know where you stand. Jumping straight into A/B testing without a clear baseline is like trying to find a destination without a map. A proper audit gives you that data-driven foundation, helping you form solid hypotheses and prioritise changes that will actually move the needle.
This first step takes you from "I think this looks better" to "I know this is broken." You’ll uncover the hidden friction points, confusing messages, and technical glitches that are quietly killing your conversion rates. The goal is to get a complete picture of what’s working, what isn’t, and why.
Evaluating User Experience and Message Clarity
The first hurdle for any landing page is the five-second test. Can a new visitor figure out what you're offering almost instantly? If your core message is buried or confusing, they'll hit the back button before you ever get a chance to win them over.
Your audit needs to walk through the entire user journey from their perspective. It’s easy to forget that how people interact with your site has a massive impact on performance, so it's worth learning how to optimize the user experience to drive more conversions. Start by asking the tough questions a first-time visitor would have.
Here's what I always look for:
- Headline and Subheading Alignment: Does the main headline match the ad or link they just clicked? A disconnect here is one of the biggest reasons for a high bounce rate.
- Visual Hierarchy: Does the design naturally draw your eye to the main CTA? Your most important elements should pop, not get lost in the noise.
- Clarity of the Offer: Is it dead simple to understand what they get by converting? Any ambiguity creates hesitation, and hesitation kills action.
- Effort vs. Reward: Is the value of your offer clearly greater than the effort it takes to get it (like filling out a ridiculously long form)?
A landing page that forces users to think is a landing page that fails. Your audit's primary goal is to identify and eliminate every point of cognitive friction that stands between the visitor and the conversion.
This kind of systematic review helps you spot problems that are often invisible when you're too close to the project. To make sure nothing slips through the cracks, a structured approach is key. For a really detailed breakdown, our comprehensive Webflow checklist offers a step-by-step guide for reviewing every critical part of your page.
Confirming Your Analytics Configuration
An audit is pretty useless if the data you're looking at is wrong. Bad analytics will lead you straight to bad decisions based on flawed info. So, a crucial part of your audit is simply confirming that your tracking setup is working and makes sense.
Start with the basics in Google Analytics. Are your main conversion goals actually firing when they should? A quick test—just complete the conversion action yourself while watching the real-time reports—can confirm this in seconds.
Beyond that main goal, check that you're tracking key micro-conversions and events. These are the smaller interactions, like video plays, PDF downloads, or how far someone scrolls. This data gives you invaluable clues about user engagement and where people might be dropping off. You’ll need it later when you start brainstorming ideas for A/B tests. Finally, double-check that your other tools, like heatmaps or session recording software, are installed correctly and capturing data on the specific page you're auditing.
Improving Technical Performance and Webflow SEO
You can have the most beautifully designed landing page with killer copy, but it means absolutely nothing if it’s painfully slow or completely invisible to search engines. Let's be clear: technical performance isn't just a "nice-to-have"; it's the absolute bedrock of landing page optimisation. It has a massive impact on user experience and, just as importantly, on how Google judges your page's quality.
Honestly, every single second of delay ramps up the chance a visitor will just give up and leave. With a Webflow site, this usually comes down to a few common culprits that, thankfully, you can get a handle on pretty quickly.
Boosting Your Webflow Page Speed
Slow loading times are absolute conversion killers. It's a harsh reality that a page taking more than three seconds to load can hemorrhage almost half its potential traffic before anyone even reads your headline. The good news is that Webflow gives you the tools to keep things snappy.
Your first port of call should always be asset management. Huge, uncompressed images are, without a doubt, the number one cause of sluggish landing pages. Before you upload a single image to Webflow, make sure it’s been through a compression tool.
- Image Compression: Tools like TinyPNG or ImageOptim are your best friends here. They can slash file sizes with barely any noticeable drop in quality.
- Next-Gen Formats: Webflow supports WebP images, which offer far better compression than old-school JPEGs and PNGs. Taking a moment to convert your images to WebP can make a world of difference to your load times.
- Lazy Loading: Always enable lazy loading for images that sit below the fold. It's a simple setting inside Webflow that stops these images from loading until a user actually scrolls down to them, making that crucial initial view load much faster.
Beyond images, keep a close eye on any custom code and third-party scripts. While useful, things like analytics trackers, heatmap tools, or live chat widgets can add serious weight to your page. Always ask yourself if a script is truly essential. If it is, load it asynchronously whenever you can to stop it from blocking the rest of your page from rendering. If you want to go deeper, there are some great guides on how to fine-tune your Webflow page speed for optimal performance .
Understanding and Fixing Core Web Vitals
Core Web Vitals are the specific metrics Google uses to measure a page's real-world user experience. Nailing these isn’t just about SEO; it's about keeping your visitors happy. There are three main signals to watch:
- Largest Contentful Paint (LCP): This measures how quickly the main content loads. To improve your LCP, make sure your hero image or primary headline block is as optimised as it can be.
- First Input Delay (FID): This is all about interactivity. It’s often bogged down by heavy JavaScript. Keeping custom scripts to a minimum is the key to a low FID.
- Cumulative Layout Shift (CLS): This measures visual stability. A classic cause of poor CLS is when images or ads load without their dimensions specified, making the content jump around. You can fix this by always setting width and height attributes for your images right in Webflow.
Core Web Vitals aren't just abstract technical metrics; they are a direct measure of user frustration. A low score means your page is likely providing a clunky, annoying experience that costs you conversions.
You can check all of these vitals using Google PageSpeed Insights . The report will show you exactly what's wrong and give you solid recommendations, most of which you can fix directly in the Webflow Designer.
Essential On-Page SEO for Your Landing Page
Finally, you need to make sure search engines can actually understand what your page is about. Even if your landing page is built for a specific paid campaign, solid on-page SEO can give you a nice, long-term organic traffic boost.
Jump into the Webflow Page Settings and focus on these core elements:
- Title Tag: This is the blue link people see in search results. It needs to be compelling, include your main keyword, and ideally stay under 60 characters .
- Meta Description: This is the little summary that appears under the title. While it’s not a direct ranking factor, a great meta description convinces people to click. Clearly state the value and pop your call-to-action in there.
- Header Structure (H1, H2s): Use one—and only one—H1 tag for your main headline. Then, use H2s and H3s to break up the rest of your content into logical sections. This hierarchy helps both users and search crawlers make sense of your page.
By weaving these technical and SEO best practices into your process, you’re building a landing page that isn't just persuasive but also fast, stable, and easy to find.
Crafting High-Converting Copy and CTAs
Getting visitors to your page is only half the battle. Your technical setup might be flawless, but it's the words and the buttons that ultimately convince someone to stay and take action. This is where psychology and design really come together to guide a user from "just browsing" to "I need this".
Think about it: every single element, from that big headline at the top down to the tiny text on your sign-up button, plays a part. It's not just what you say, but how and where you say it. I've seen a simple tweak in wording or a different button colour completely change the game for a landing page.
Writing Headlines That Hook Attention
Your headline is your first impression. Often, it's your only impression. Its one and only job is to stop someone in their tracks and convince them the rest of the page is worth their time. A vague or boring headline is a one-way ticket to a high bounce rate.
So, how do you write one that works? You need to speak directly to your visitor's biggest problem or their most desired outcome. Be clear, be concise, and focus on the benefit. Don't just list a feature; explain the problem it solves.
- Weak Headline: "Our Advanced CRM Software" (This is about you, not them.)
- Strong Headline: "Stop Juggling Spreadsheets and Close More Deals" (This is about their pain and their goal.)
The aim is to create an instant "aha!" moment. When a visitor reads that headline, they should immediately think, "Yes, that's me. That's what I need." That connection is what earns you their attention for the next crucial seconds.
Communicating Value with Clear Body Copy
Once the headline has done its job, the body copy needs to deliver. This is where you build on that initial interest, answer their unspoken questions, and earn their trust. So many landing pages drop the ball here, hitting users with a wall of text filled with jargon.
Your copy needs to be scannable. People don't read online; they skim. Use short sentences, bullet points, and give your words room to breathe with plenty of white space. For a more detailed look at this, our guide on writing effective copy for your website is a great place to start.
The best copy doesn't try to sell. It helps the user buy. It gets ahead of their questions, tackles their doubts head-on, and makes the value so blindingly obvious that converting feels like the most natural next step.
Break down what you offer into simple, real-world outcomes. Use subheadings to act as signposts, guiding the reader through the page so they can easily find what matters most to them. Make your key points impossible to miss.
Designing Calls-to-Action That Drive Clicks
The Call-to-Action (CTA) is the moment of truth. It’s the final nudge, the trigger for the conversion, so its design and wording are absolutely critical. A lazy CTA like "Submit" or "Click Here" is a massive wasted opportunity. Your button text should be active and reinforce the value they're about to get.
Just look at the difference:
- Instead of "Download," try "Get My Free Ebook."
- Instead of "Sign Up," try "Start My 14-Day Free Trial."
The design is just as important. Your button needs to pop. Use a colour that contrasts with the rest of the page, making it a clear focal point. Don't make people hunt for it—place it prominently above the fold and then repeat it after any long sections of copy.
This isn't just guesswork; the data backs it up. In the UK, the average landing page conversion rate hovers around 6.6% . But here's the kicker: personalised CTAs have been shown to outperform generic ones by an incredible 202% . And it's not just about words. UK marketers are seeing real results with multimedia, with 39% reporting that adding videos to their landing pages gives conversions a significant boost. You can find more data on how multimedia and personalisation impact conversions from SellersCommerce .
By weaving together benefit-driven headlines, scannable copy, and compelling CTAs, you create a powerful narrative that smoothly guides users right where you want them to go.
Running Effective A/B Tests in Webflow
Once your copy is sharp and your CTAs are compelling, it’s tempting to hit publish and call it a day. But the real work in landing page optimisation is just getting started. Without testing, you’re still operating on educated guesses, no matter how well-researched they are.
A/B testing is how you swap that guesswork for certainty, letting your audience’s behaviour tell you what truly works.
This isn’t about throwing random ideas at the wall to see what sticks. Effective testing is a disciplined process. It’s about building a cycle of continuous improvement, where every test—win or lose—gives you valuable insight into what makes your audience tick.
Forming a Data-Backed Hypothesis
Every meaningful A/B test starts with a strong hypothesis. A weak one sounds like, "I think a green button will work better." A strong one is specific, measurable, and rooted in the data you gathered during your audit. It connects a proposed change to an expected outcome.
For example, your heatmaps might show users are clicking on a non-clickable icon in your hero section. Total confusion. A solid hypothesis would sound more like this: "By replacing the confusing static icon with a secondary CTA button linking to our features page, we'll reduce bounce rate and increase time on page because we are providing a clear path for users seeking more information."
See the difference? This structured approach forces you to justify every change. It’s the difference between random tinkering and strategic landing page optimisation.
Prioritising What to Test First
With endless possibilities, knowing where to start can feel overwhelming. The key is to prioritise tests based on their potential impact. Don’t get bogged down testing tiny font size changes when your main headline might be completely missing the mark.
A simple framework I use for prioritisation is ICE:
- Impact: How significant could the conversion lift be if this hypothesis is correct? Big changes like a new headline or hero layout have a much higher potential impact than a minor copy tweak.
- Confidence: How sure are you that this change will produce a positive result, based on your audit data and past experiences?
- Ease: How quickly and easily can you implement this test in Webflow? A simple text change is worlds away from a complete section redesign.
Focus your energy on the tests that score high across all three categories. Generally, you’ll get the biggest wins by testing elements "above the fold" first, as they influence every single visitor. Start with your value proposition, headline, hero image, and primary CTA.
Essential Tools for Webflow A/B Testing
Webflow integrates smoothly with several powerful third-party testing tools. You don't need an expensive suite to get started, but you do need a platform that can reliably split traffic and measure results.
- Google Optimize: Though it’s being sunsetted, its functionalities are moving into Google Analytics 4. The principles remain the gold standard for free A/B testing.
- VWO (Visual Website Optimizer): A personal favourite. It’s a user-friendly platform that offers A/B testing, heatmaps, and session recordings all in one place.
- Optimizely: A more enterprise-level solution that provides robust testing capabilities for larger teams with complex needs.
Integrating these tools with Webflow usually just involves adding a small JavaScript snippet to your site’s custom code settings. This lets the tool manipulate your page elements and show different versions to different segments of your audience. The workflow below illustrates this powerful sequence.
This visual just hammers home the point: a powerful headline must lead to persuasive body copy, which then funnels users directly into a clear call-to-action. These are the three core components you should constantly be testing.
The goal of an A/B test isn't just to find a winner. It's to learn something about your audience. A failed test that teaches you what doesn't work is often just as valuable as a successful one.
Once a test is running, resist the urge to peek at the results every hour. Let it run until it reaches statistical significance —usually a 95% confidence level . This ensures your results aren't just down to random chance. When you have a clear winner, implement it, document what you learned, and move on to your next hypothesis.
Measuring Success With The Right KPIs
Let's be honest: optimisation without measurement is just guesswork. You can tweak and test all day, but if you can't prove your changes are actually moving the needle, you're just spinning your wheels.
To show the real value of your landing page work, you need to ditch the vanity metrics like page views. Instead, focus on the Key Performance Indicators (KPIs) that tie directly back to business goals. This is how you connect your design and copy adjustments to actual, tangible results.
Moving Beyond Vanity Metrics
First things first, you need to define what "success" actually means for this specific landing page . This means zeroing in on metrics that reflect genuine user intent and business value, not just traffic volume.
Here are the core KPIs you should have your eyes on:
- Conversion Rate: This is your north star metric. It's the percentage of visitors who complete the desired action, whether that's filling out a form, signing up for a trial, or hitting "buy now." It's the most direct measure of your page's effectiveness.
- Cost Per Acquisition (CPA): If you're running paid campaigns, this one is non-negotiable. CPA tells you exactly how much you're shelling out for a single new customer or lead. Your mission, should you choose to accept it, is to drive this number down through smart optimisation.
- Lead Quality: A flood of conversions means nothing if the leads are junk. You need to track how many of those leads actually move down the funnel and become sales-qualified.
A lower conversion rate of high-quality leads is almost always more valuable than a high conversion rate of unqualified tyre-kickers. Optimisation isn't just about getting more clicks; it's about getting the right clicks.
The table below breaks down these essential metrics, explaining what they measure and why they're crucial for tracking the success of your optimisation efforts.
Key Landing Page Optimisation Metrics
Tracking these KPIs gives you a complete picture of performance, allowing you to make data-backed decisions instead of relying on intuition alone.
Setting Up Tracking In Google Analytics
You can't manage what you don't measure, and accurate tracking is the foundation of it all. Google Analytics is your best friend here. Setting up goals and events is how you translate your KPIs into data you can actually use.
Inside your GA4 property, you need to configure events to fire whenever a user completes a key action. A classic example is creating a " generate_lead " event that triggers on a successful form submission. By marking this event as a conversion, you can directly measure your landing page's performance and see which A/B test variations are actually driving results.
Ultimately, all this tracking and analysis is in service of one goal: applying proven conversion rate optimization best practices to see these numbers climb.
And remember, small details can have a huge impact. Data from the UK market shows that forms with three to five fields perform best, with a three-field form hitting an impressive 10% conversion rate . On top of that, testimonials appear on over 36% of high-performing pages, proving that social proof is as powerful as ever. You can dig into more UK-specific landing page statistics from Hostinger .
Your Top Landing Page Optimisation Questions, Answered
Even with the best playbook in hand, you’re bound to hit a few roadblocks or have questions pop up. It happens to everyone. So, I’ve put together answers to some of the most common queries we get from clients diving into Webflow landing page optimisation.
Think of this as your quick-reference guide for those moments that can otherwise slow you down.
How Often Should I Be Testing My Webflow Landing Pages?
There's no magic number here—the right testing frequency really comes down to how much traffic your site gets. It's a game of volume.
If you’re running a high-traffic site, you're in a great position to test weekly or every couple of weeks. More visitors means you hit statistical significance —the point where your results are actually reliable—much faster. This lets you iterate quickly and bag some early wins.
On the flip side, if your traffic is on the lower side, you've got to play the long game. Don't be afraid to let a test run for a month, maybe even longer. You need enough data to make a confident call. Pulling the plug too early is a classic mistake that leads you to act on random noise instead of real user behaviour.
The goal isn't to stick to a rigid schedule but to build a habit of continuous improvement. Your most important landing pages should almost always have a test running.
Kick things off by testing the big, bold changes that are most likely to move the needle. I'm talking about things like:
- Your main headline and value proposition.
- The entire hero section concept and layout.
- The text and placement of your main call-to-action button.
Once you’ve dialled in these major elements, then you can start fine-tuning the smaller details like form field labels, secondary copy, or different trust signals.
What's The Single Biggest Optimisation Mistake People Make?
Easy. It's making changes based on gut feelings, what you personally like, or worse, just blindly copying what a competitor is doing. This approach completely ignores the only opinion that actually matters: your audience's .
What works wonders for one company can completely tank for another. Every audience has its own unique motivations, frustrations, and expectations. When you're not using your own data to guide your decisions, you're just throwing things at the wall and hoping something sticks.
This leads to a frustrating cycle of wasted effort. You can sink weeks into a redesign only to see it do absolutely nothing for your conversion rate—or even make it worse.
Before you touch a single element on your Webflow page, always, always start with a hypothesis backed by data. Use your audit findings, heatmap analysis, and what you learned from past A/B tests to inform every experiment. Data is what separates strategic, purposeful action from random guessing.
Can I Actually Do This Without Spending a Fortune on Tools?
You absolutely can. While the big-name premium tools like VWO , Hotjar , or Optimizely are fantastic, you can get incredible results with a handful of free or low-cost alternatives. Your success hinges more on your strategy and process than the size of your budget.
It's your ability to analyse data, come up with smart hypotheses, and test them methodically that really drives results—not the price tag of your software stack.
Here’s a solid, free starter kit to get you going:
- Google Analytics : This is non-negotiable. It's the bedrock for tracking conversions, understanding user flow, and measuring all your core KPIs.
- Microsoft Clarity : An absolute gem of a free tool. It gives you heatmaps to see where people click and session recordings so you can watch actual user journeys unfold. It's like looking over their shoulder.
- A/B Testing Platforms: Even with Google Optimize gone, there are plenty of platforms that offer generous free tiers or trials. They're more than enough to get your testing programme off the ground.
Get comfortable with the fundamentals using these tools first. You can always level up and invest in more advanced software down the line once your optimisation efforts start showing a real return.
Ready to stop guessing and start building pages that actually convert? The team at Derrick.dk specialises in turning Webflow sites into high-performing conversion machines. Book a call with us today to diagnose your landing page issues and build a clear roadmap for growth.

.jpg)